

When we first moved into this house three years ago, it was with location in mind. We moved from a beautiful four bedroom home in a pretty neighbourhood just outside the city core, to a smaller, semi-detached home with three bedrooms in an excellent school district, walking distance to the subway. I knew that the boys sharing a room was going to be an issue one day, but it’s only been in the last year that they’ve been bugging me about to DO SOMETHING ABOUT IT. Fortunately it’s a big room with two windows evenly spaced. Initially, we put up a curtain to divide the area, but we used a wire and hook system, which wasn’t all that sturdy so it came down on a regular basis. We looked at putting IKEA bookcases down the middle of the room, but for many reasons, it wasn’t going to work. So it seemed to me that there were two possible courses of action. Either, leave it alone and let the boys work it out, OR, use this as a perfect excuse to test out my new-found building skills and build a wall! Guess which one I chose?

I developed my materials list and sent it to Ian Burns at the BiY Learning Center to make sure I had everything down and the correct amounts of each (I did, hooray! Off to a great start!). I called in an electrician to have him move the one centered light in the middle of the room to two lights and two switches. It was then that he told me I had wet insulation above one of my son’s bed, which meant a leak in the roof above. Figures.
After having a temper tantrum and then dealing with the leak and the resultant damage caused by water pooling in insulation and the vapor barrier, we were back on track to building the wall (the leak is a whole ‘nother blog post).
-

cutting away baseboard
-
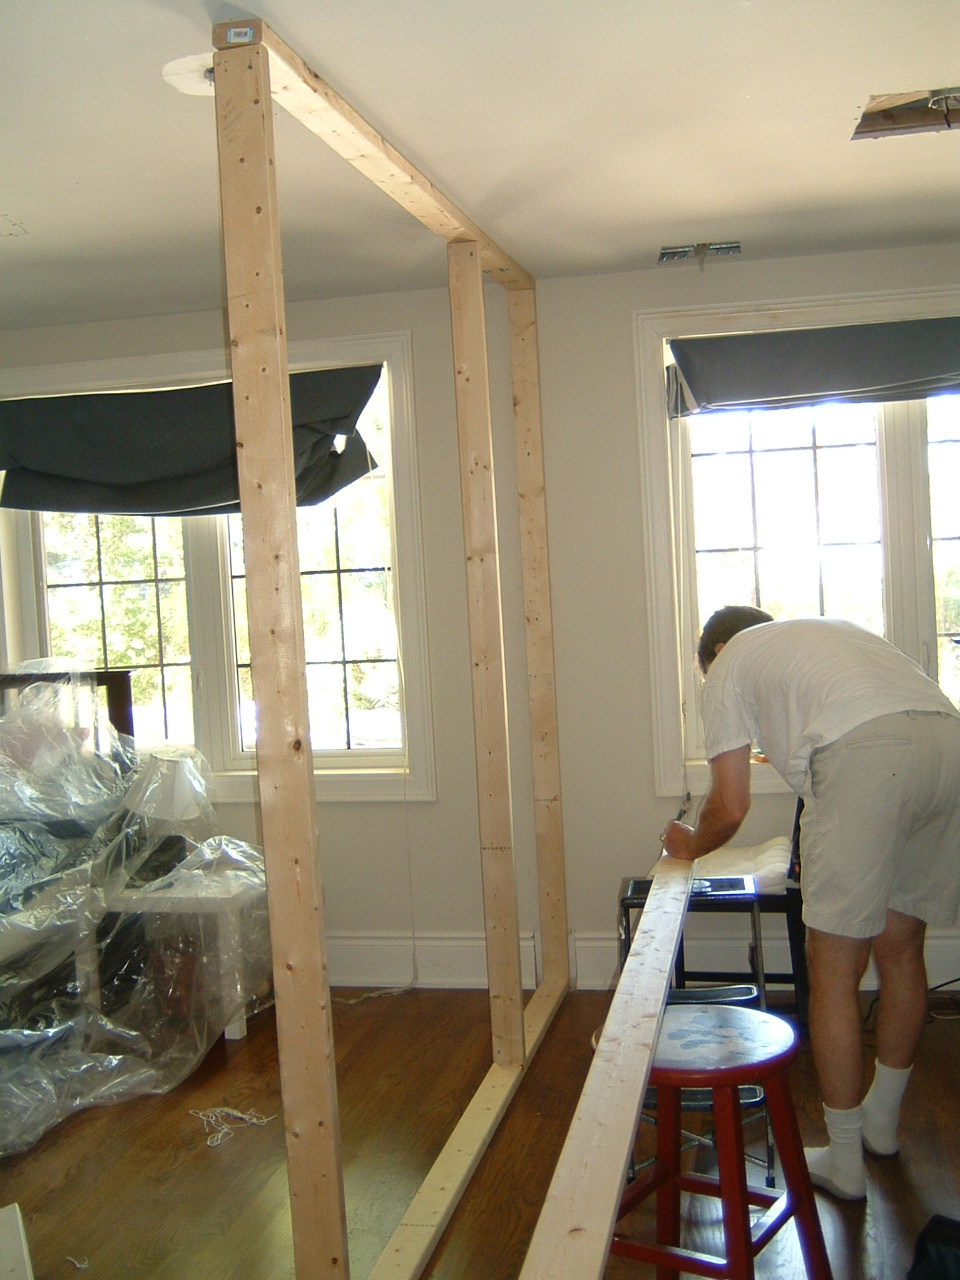
Initial Frame Construction
-
Framing is complete!


Lumber: I located FSC-certified 2x4s at my local (Leaside) Home Depot. What I forgot to check was how straight the pieces were — which, it turns out, weren’t very. Last week when I was at the Green Building Festival, I remarked to Mark Kidd of Tembec on the fact that 4 of the 9 pieces of timber I’d bought (and cut before I could return them) were significantly warped. Tembec is the main supplier of FSC-certified lumber to Home Depot and he told me that that’s unusual because Home Depot orders tier 1 lumber, which is the highest grade lumber you can get. I put it down to beginner’s inexperience of forgetting to check the lumber before buying.
We measured and constructed the wall frame and I based the measurements on the drywall sheet size so there’d be as little waste as possible. We cut the baseboard out of the wall so we could mount the wall completely flush to vertical wall, nailed in the ceiling and floor beams, measured between each beam at 16″ intervals and cut studs to match. This is the part my husband, Kevin, and neighbour, Victor, helped me with. Victor kindly cut the pieces of wood with his skill saw (way faster than manually, although we did about half of them by hand), and Kevin hammered in the pieces — also faster than me.
-
Oops! First insulation, THEN second side of drywall!
-
Ultra Touch Cotton Insulation
-
First side of drywall


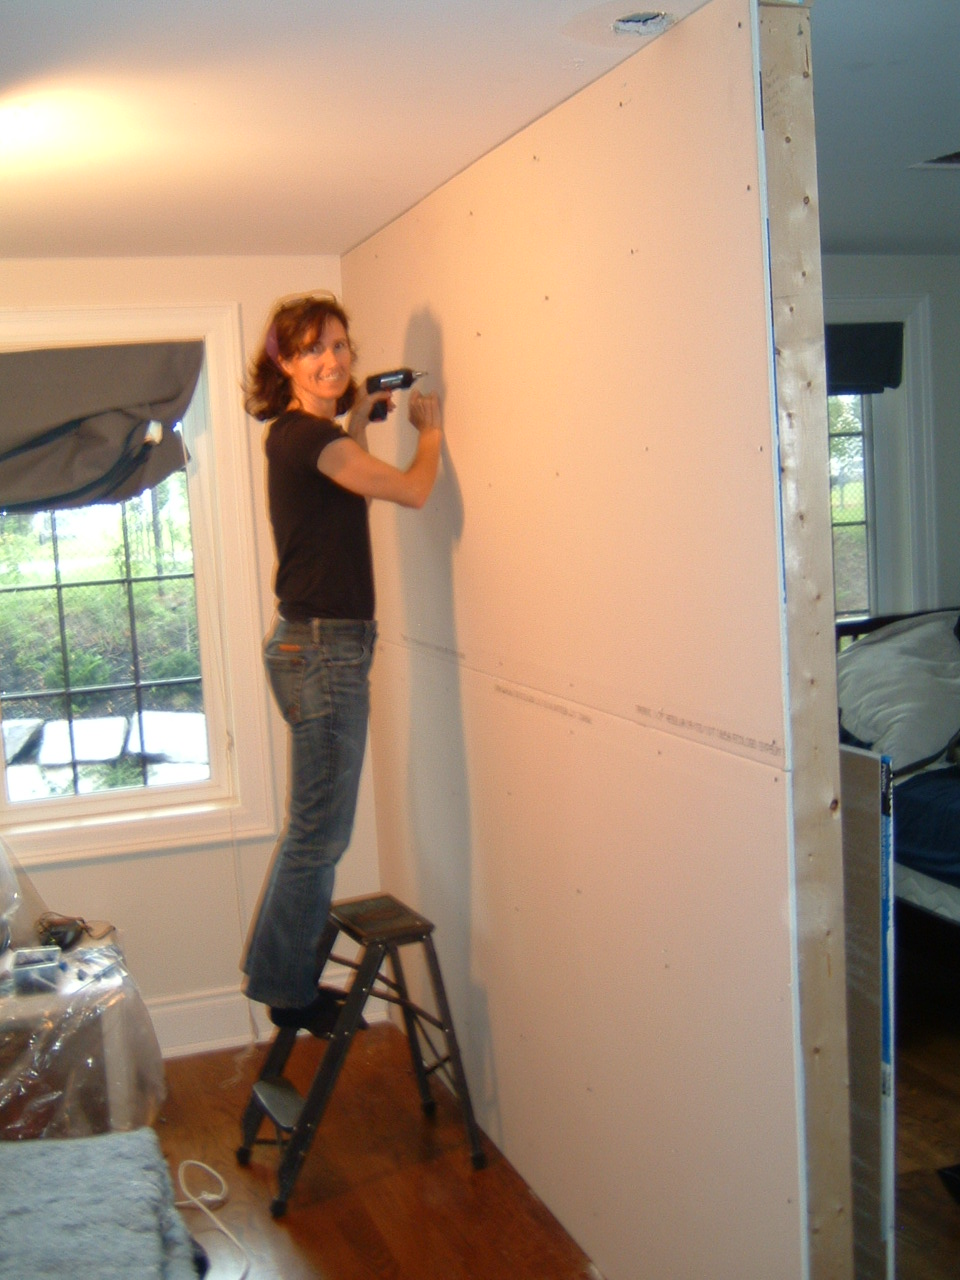
Drywall: I located CertainTeed drywall at Rona, Sheppard and Willowdale, which is synthetic, recycled drywall made in the west end of Toronto. We screwed the drywall to one side of the wood frame. The ceiling is lower than a regular ceiling, so we had to cut the second piece of drywall down to 3.5′, again measuring at different intervals because the ceiling height varies as you go towards the middle of the room.
Insulation. We used Ultra Touch insulation. Although there won’t be a door of any kind between the two sections, the insulation adds sound dampening and sturdiness to the wall. Ultra Touch Insulation is a great product; no gloves or masks required to use, it fit snuggly into the wall section and it’s made from scrap denim fabric.

Next, we sealed up the wall with the second two sheets of drywall. It turns out you do have to measure again on the other side of the wall. Logic would dictate that the wall would be the same height on both sides of the frame but then, logic would be wrong! We goofed a little on the cutting the second upper piece of drywall so there is a bit of a bump up at the ceiling/wall joint that just screams “DIYer!” — oh well. You have to make a mistake here and there.
Mudding and Taping and Sanding, Oh My. Oh my, oh my oh my. I still suck at this part of the job. While I’m improving, it certainly is a skill that takes practice. I can see my mistakes pretty easily, and as much as I tried to apply as little mud as possible, this was easier said than done. I’m sure if I did a few hundred more walls, I’d have the technique down pretty thoroughly. I don’t think I’ll ever get that far though.
Priming and Painting and Caulking. I used a low VOC caulk from Adbond, a Montreal company that makes a lot of eco-friendly sealants and finishes. I primed with Behr water-based primer and painted the ceiling after patching the holes made by the light being moved and the roof leak. I painted the peninsula wall (the divider wall), Cloud Blue from low VOC Pittsburgh Paints….then then I gave up. Yes, that’s right, I threw in the towel, I called “uncle!” I raised the white flag! I called my trusty painter Terry MacKenzie to finish the painting. By this time I’d been working on the darn thing (which was now known as “THE WALL” in any email correspondence I had with friends) for about 3 weeks in the spare time that I had and our house, my work, the family and my mood were all suffering for it. I’d already seen signs that I was cracking: I’d left little blue smudges of wall paint on the new white ceiling and I didn’t care. When you work that hard, you want the results to show it and a sloppy paint job is the first thing people will notice. Terry finished the job in 4 hours, it would have taken me 16.
Voila! I feel pretty proud of myself now that I have this new set of skills to build a wall. Granted, it was a simple job, but still and all, it feels like an accomplishment. While I was building this wall, I had a thought: Building is a lot like cooking. You have a set list of ingredients, a certain amount of each is needed and they’re combined in a specific order. So I decided I’ll write a book all about construction skills to help women not be quite so intimidated by building projects and I’ll call it If You Can Cook, You Can Screw! What do you think?
Resources:
Home Depot, 101 Wicksteed Ave., Toronto, ON. for FSC-certified lumber. Call your local Home Depot first to make sure they carry it.
Rona, 258 Sheppard Ave. East, Toronto, ON. for CertainTeed Drywall. CertainTeed Drywall: Synthetic drywall manufactured in the west end of Toronto. Even the face and back paper are 100% recycled.
Eco-Building Resource: 136 Wellington Street East, Aurora, ON. Ultratouch Cotton Insulation, AdBond caulk.
Terry MacKenzie (painter extraordinaire): 416-254-3090
BiY Learning Centre : 358 Dufferin Street, Toronto, ON. For home improvement classes.
[mappress]
GOOD JOB !!
Cathy, everything looks good but next time 24″ o.c. for the wood studs. If FSC is not available in an area then I would suggest finger jointed as an alternate. Typically it’s stronger and straighter than regular lumber.
p.s. there are no 90 degree angles in housing!
Thanks Terrell! I was going to do 24 o.c. but the insulation was only available in 16″ widths.
As to next time, really not sure if there will be a next time. Am still recovering from this time!
Give me a year or so and I’ll be up for another challenge;)
You should check out Homestead House Paint Co. A local Eco Paint company right here in Toronto.
They have all natural earth based paints—why would you use a “Low VOC ” paint anyways?? It’s full of toxic junk…
Thanks for the suggestion! It’s on my list! I have a bedroom that needs painting so I was thinking of trying out Homestead’s paints.